
Coconut is a healthy and delicious alternative to milk and heavy cream and the pulp can be used as great gluten free flour!
These are simple recipes that are cost effective that will add new dimensions to your recipes all from coconut flakes and water! This is the basics of making delicious and versatile coconut milk, flour, and whipped cream.
Ingredients
½ cup Unsweetened coconut flakes
14 oz water
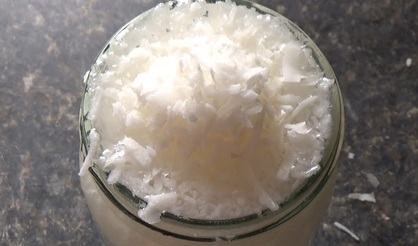
The Milk
The thick or thinness of the milk is entirely up to your preference. This ratio of flakes to water will give you a balance of consistency. Simply add coconut flakes to water and allow the coconut flakes to absorb the water for a few minutes and blend for 45 to 90 seconds. Strain the pulp from the milk with a nut bag or strainer and squeeze out the excess liquid. Put in an air tight container and keep in the fridge for up to a week.
The Flour
From the excess pulp from the milk we can easily make flour. Set oven to lowest setting, for me it was 150 degrees F, or use a dehydrator. On a cookie sheet or a flat dish spread the flour out to a thin layer. Put in the oven for 30 minutes. After every 30 minutes mix the flour around to mix the wet and the dry areas to allow it to dry faster. Repeat 2 more times or until the coconut has become completely dry to the touch. Store in an air tight container an place in a dark cool place. This will stay good about 3 to 4 months.
The Whipped Cream
*The amount of coconut flakes you make the milk with reflect about how much cream you will get. Less flakes = less cream < more flakes = more cream. Allow the milk to separate in the fridge for around 8 hours to overnight. Once fully separated scoop out just the cream. Blend on low speed till you get a thick fluffy consistency.
Super simple! You can of course make the milk sweet or savory. Just know that if you add flavors to the milk while blending that will be in the flour and cream. Click here to learn how to make plant based No Bake Cookies & Cream Cheesecake.
Thank you for joining me! Hope you enjoyed! If you would like to receive exclusive chapters our e-book subscribe below and if you would like to buy our e-book click here.
½ cup Unsweetened coconut flakes
14 oz water
The Milk
The thick or thinness of the milk is entirely up to your preference. This ratio of flakes to water will give you a balance of consistency. Simply add coconut flakes to water and allow the coconut flakes to absorb the water for a few minutes and blend for 45 to 90 seconds. Strain the pulp from the milk with a nut bag or strainer and squeeze out the excess liquid. Put in an air tight container and keep in the fridge for up to a week.
The Flour
From the excess pulp from the milk we can easily make flour. Set oven to lowest setting, for me it was 150 degrees F, or use a dehydrator. On a cookie sheet or a flat dish spread the flour out to a thin layer. Put in the oven for 30 minutes. After every 30 minutes mix the flour around to mix the wet and the dry areas to allow it to dry faster. Repeat 2 more times or until the coconut has become completely dry to the touch. Store in an air tight container an place in a dark cool place. This will stay good about 3 to 4 months.
The Whipped Cream
*The amount of coconut flakes you make the milk with reflect about how much cream you will get. Less flakes = less cream < more flakes = more cream. Allow the milk to separate in the fridge for around 8 hours to overnight. Once fully separated scoop out just the cream. Blend on low speed till you get a thick fluffy consistency.
Super simple! You can of course make the milk sweet or savory. Just know that if you add flavors to the milk while blending that will be in the flour and cream. Click here to learn how to make plant based No Bake Cookies & Cream Cheesecake.
Thank you for joining me! Hope you enjoyed! If you would like to receive exclusive chapters our e-book subscribe below and if you would like to buy our e-book click here.
 RSS Feed
